Develop a modular application with JTheque Core 2.0.3
1. Introduction
This article will teach you how to develop a first application with JTheque Core.
We will develop a basic modular application, like an hello world. This little program will be composed of :
- A JTheque application
- A JTheque module who display an Hello World on the main view
- A module who will add an option menu to display one more time "Hello World"
2. JTheque environment
The first thing to do before starting develop our application and our modules is to download the "development environment" of JTheque Core. A JTheque application needs some files and librairies to work.
You can download an archive containing all necessary files on the website of the projects. Then you must choose the dev-base-XXX.zip file where XXX is the version number. In our case, we need the dev-base-2.0.3.zip file.
When you've downloaded the file, unzip it. Here is the content of the folder :
- core : Contains JTheque Core, the configuration and the application
- lib : Contains all the librairies
- modules : Contains all the modules
- JTheque-Launcher.jar : The launcher of the application. You must execute this file to launch your application.
We only have two things to change in this folder. First, we have to add our application (application.xml) and its resources in the core folder. Then, we have to add our modules in the "modules" folder and declare it in the JTheque configuration.
3. Application
Now that we seen what is a JTheque Application, we'll develop it, the first part of our program.
An application is basically a container for modules. It has a name, a version but adds no functionaly to the application, this a function of the modules. An application without modules is not useful and vice-versa.
An application is composed of several things :
- An XML file (application.xml) describing the application
- Some images (in the core/images folder)
- Eventually some .properties i18n files in the core/i18n folder
To define the internationalization values of the application, there is 2 ways. We can define the values directly in the XML file or use some i18n .properties files. This is this solution we will use in our case. The resource bundle must be named application and be in the core/i18n folder. Here are the files to create :
application.properties
name=JTheque Demos
author=Baptiste Wicht
[email protected]
application_en.properties
site=http://jtheque.developpez.com/en
copyright=JTheque 2009 All rights reserved
application_fr.properties
site=http://jtheque.developpez.com/
copyright=JTheque 2009 Tous droits reservés
Then, we can write the application.xml file :
We declared than our application is available in french and in english. Moreover, we declare () to use the i18n files. i18n properties.
The core is translated in english, french and german.
For the images, we start to declare a logo.png file and a icon.png file for the application. We can use other extension specifying type="jpg" for exemple for a .jpg file.
Here are the used images :
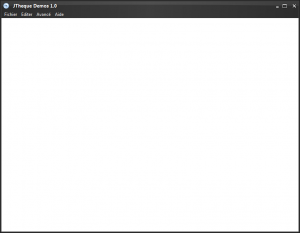
We will now make a first try. For that, you just have to launch the JTheque-Launcher.jar at the root of the JTheque folder. It will launch the core with our application.
Here is the result :
We can see that the application launches weel, but there is nothing really interesting to do in this application because there is no modules to add functionalities.
4. The first module
Now that our module has been developed and is functional, we can make our first module of the application.
This module will be very simple. It just display "Hello World !" on the main componnent of the application in an internationalized way.
To declare a module, we need to create class with the @Module annotation. Then, we have to declare it in the Spring context and declare this last in the manifest of the jar.
It's not necessary to know Spring to use JTheque. If you don't want to use Spring in your application, you can just declare the module in the Spring context withtout using it and then develop your application without use Spring context. You just have to know that the module will be created by Spring.
The life cycle of a module is composed of three states :
- pre-plug : To make pre-configuration
- plug : Here you must add the module in the application. It means edit view, add config elements, ...
- unplug : Remove the module from the application
To make operations in this 3 phases, you just have to add annotations on methods, respectively @PrePlug, @Plug et @Unplug. Then the application will detect this methods and invoke them.
In our case, we need to edit the main component of the view in the plug phase. So we doesn't need the other phases.
Starting with declaring our module with necessary annotations :
package org.jtheque.demos.first;

import org.jtheque.core.managers.module.annotations.Module;

import org.jtheque.core.managers.module.annotations.Plug;

@Module(id = "jtheque-demo-module-1", i18n = "classpath:org/jtheque/demos/first/i18n/first", version = "1.0", core = "2.0.3",
        jarFile = "jtheque-demo-module-1.jar")
public final class DemoFirstModule {
    @Plug
    public void plug(){

    }
}
Here again, there is nothing hard. The annotation Module declare the informations about the module. The plug method is for this time empty. The i18n annotation contains the path (Spring resource convention) to the resource bundle of the module. bundle du module.
Now we can declare informations about the module in the i18n files.
A i18n file is a simple .properties file who contains a list of key/value couples. A i18n file represent a language. We use a set of this files to internationalize the application. They must have the same base name and finish with _language where "language" is the short form of the language$ (de, fr, en, it, ...).
The key will be search depending on the id of the module. We directly add also the internationalization of the main view :
first_en.properties
jtheque-demo-module-1.name=JTheque Demo Module 1
jtheque-demo-module-1.author=Baptiste Wicht
jtheque-demo-module-1.description=First demo module
label.message=Hello World !
first_fr.properties
jtheque-demo-module-1.name=JTheque Demo Module 1
jtheque-demo-module-1.author=Baptiste Wicht
jtheque-demo-module-1.description=Premier module de démo
label.message=Bonjour le monde !
The application will automatically search and resolve this messages to internationalize the module. We put this files in the org/jtheque/demos/module/first/resources/18n folder.
To extend the application or access to the services of JTheque, we always have to use the Managers class who provide access to the managers (services) of JTheque Core. In our case, we need to access IViewManager who manage the view of the application.
In the plug() method, we just have to add a JLabel with an internationalizable text. In JTheque, to make a component internationalizable, we have to implement the Internationalizable interface and add it to ILanguageManager to keep it in the good language. In the case of a label, this component exists in JTheque Core, its the JThequeI18nLabel who takes a i18n key as constructor parameter :
@Plug
public void plug(){
    SwingUtils.inEdt(new Runnable(){
        @Override
        public void run(){
            JThequeI18nLabel label = new JThequeI18nLabel("label.message");
            label.setFont(label.getFont().deriveFont(36f));

            Managers.getManager(IViewManager.class).setMainComponent(label);
        }
    });
}
It's easy. We get our manager with the Managers class, then, we set our label as the main component.
Now we'll declare our module in Spring context. It's a simple XML file :
first.xml
We put this file at the same level of DemoFirstModule. For those who doesn't know spring, it's exactly if we create a new instance of our module and assign it to a variable named firstModule.
We'll try this module. Then, we have to generate a jar of our project. The manifest of the jar must have the link to our XML file. Here is our manifest file :
Manifest-Version: 1.0
Module-Context: org/jtheque/demos/first/first.xml
Then we generate our Jar file and put it on the modules files of the JTheque environment with the name of jtheque-demo-module-1.jar.
Now we have to configure JTheque to put our module in the application. To do that, we have to edit the config.xml file in the core.file. We just add the discovery tag to say that all the modules in the modules folder to the application.
config.xml
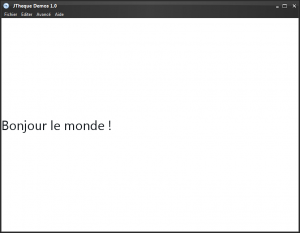
We can now test the result launching JTheque-Launcher.jar and here is what we get :
Like we can see, our module is good integrated in our application.
5. The second module
We will now create a second module who will add an option menu to display another Hello World. We could of course do that in the first module, but it's to show how to create several modules.
To add options menu, we just need the plug pahse. Here is the base of the new module (DemoSecondModule) :
@Module(id = "jtheque-demo-module-2", i18n = "classpath:org/jtheque/demos/second/i18n/second", version = "1.0",
        core = "2.0.3", jarFile = "jtheque-demo-module-2.jar")
public final class DemoSecondModule {
    @Plug
    public void plug() {
    }
}
With this i18n files :
second_fr.properties
jtheque-demo-module-2.name=JTheque Demo Module 2
jtheque-demo-module-2.author=Baptiste Wicht
jtheque-demo-module-2.description=Deuxième module de démo
dialog.message=Bonjour le monde !
second_en.properties
jtheque-demo-module-2.name=JTheque Demo Module 2
jtheque-demo-module-2.author=Baptiste Wicht
jtheque-demo-module-2.description=Second demo module
dialog.message=Hello world !
It's basically the same things than for the first module. We'll now add an option to the "File" menu. For that, we have to add an internationalizable action, JThequeAction.
So here is our simple action :
package org.jtheque.demos.second;

import org.jtheque.core.managers.view.able.IViewManager;
import org.jtheque.core.managers.view.impl.actions.JThequeAction;
import org.jtheque.core.managers.Managers;
import java.awt.event.ActionEvent;

final class HelloWorldAction extends JThequeAction {
    HelloWorldAction() {
        super("dialog.message");
    }

    @Override
    public void actionPerformed(ActionEvent e) {
        Managers.getManager(IViewManager.class).displayI18nText("dialog.message");
    }
}
Nothing hard, we use the IViewManager to display an internationalizable text in a dialog box. We can now add this action on the menu using the IFeatureManager. From JTheque Core 2.0.3, there is a declarative way to create menu actions with the Menu interface. For that, we can extends the AbstractMenu class and choose the methods to override to add menus (features).
@Plug

public void plug() {
    Managers.getManager(IFeatureManager.class).addMenu(new DemoMenu());
}

private static final class DemoMenu extends AbstractMenu {
    @Override
    protected List getFileMenuSubFeatures(){
        return features(
                createSubFeature(150, new HelloWorldAction())
        );
    }
}
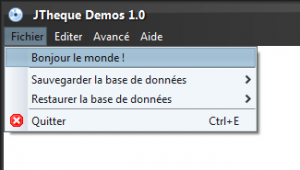
We just add an action on the "File" menu, with our action and we give it the 150 position (0 is the first position and 1000 is the last (exit)).
Then we create the Spring xml file of the second module :
second.xml
<?xml version="1.0" encoding="UTF-8"?>

<beans xmlns="http://www.springframework.org/schema/beans"
       xmlns:xsi="http://www.w3.org/2001/XMLSchema-instance"
       xsi:schemaLocation="
            http://www.springframework.org/schema/beans
            http://www.springframework.org/schema/beans/spring-beans.xsd">

    <bean id="secondaryModule" class="org.jtheque.demos.second.DemoSecondModule" lazy-init="false" />
</beans>
We can now generate the Jar file of the second module with this manifest :
Manifest-Version: 1.0
Module-Context: org/jtheque/demos/second/test.xml
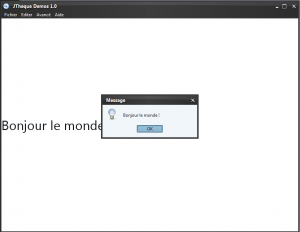
Finally, we can test the complete application using JTheque-Launcher.jar :
Our second module is well integrated.
6. Conclusion
With relatively few code, we have developed a modular applications with 2 modules and that can have a lot more of modules.
The services given by JTheque are many more. If you want to know more, for the moment, i'll guide you to the Javadoc of the last version of the core. I will try to create a full guide to present all the functionalities of the core.
If you want to comment this article, don't hesitate to add a comment on the comment form at the end of the page.
If you want to make a comment, a suggestion or talk about the JTheque project, you can also come to the dedicated forum. It's a french forum, but you can post in english.


Comments
Comments powered by Disqus