Home Server Adventure – Step 3
Here are some news about my home server installation project.In the past, I already installed a server in a custom Norco case. I wanted to replace my QNAP NAS with a better server, the QNAP being too slow and not extensible enough for my needs.
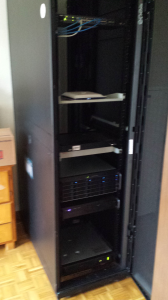
Here is it how it looks right now (sorry about the photo qualitiy :( my phone does not seem to focus anymore...):
So I replaced my QNAP NAS with a custom-built NAS. Again, I bought a NORCO case, the RPC-4220. This case has 20 SATA/SAS bays. I bought it with a replacement of the SAS backplane by a SATA one. I also ordered some fan replacement to make it less noisy. I installed my 6 hard disk in Raid 5, managed with mdadm, with LVM partitions on top of the array.
I also added an APC UPS which allows me to go through all the minor power issues that there is in my old apartment and which also me about 10 minutes of backup when there is a power outage.
I haven't added a lot of services on the server. I now run Owncloud on the server and that completely replaces my Dropbox account. I also improved by Sabnzbd installation with other newsgroup automation tools.
Not directly related to my rack, but I also installed a custom XBMC server for my TV. It reads from the NAS server. And of course, it runs Gentoo too.
In the future, I'll add a new simple server as a front firewall to manage security a bit more than here and avoid having to configure redirection in my shitty router (which I would like to replace, but there are not a lot of compatible rack router for my ISP unfortunately). It will probably use a Norco case too.
If you have any question about my build, don't hesitate ;)

Comments
Comments powered by Disqus